
How to Take Better Images on Your Smartphone
Smartphones are all-singing and all-dancing extensions of ourselves — ever present in our home, work, play, home, continuum. They often have bigger hard drives and more powerful processors than some laptops. It seems like the only thing they can’t do is jump tall buildings.
The app market turns over around $80 billion annually, and with 6 million apps to choose from, journalists can download all manner of work-related tools. One of the capabilities that is always discussed by mobile journalists — or mojos — is the camera. Advanced apps like FiLMiC Pro, Beastcam, and Camera+ transform the standard smartphone camera into a digital single-lens reflex camera, or DSLR…well, almost.
Much is written about these and other advanced camera apps, but let’s take a closer look at the features of the ordinary iPhone camera. These features should be mastered before diving into advanced apps.
I didn’t become a mojo trainer to learn video. My background was video storytelling — producing, directing, writing, and shooting thousands of stories and programs for primetime TV. So, my approach is very practical and tested in the field.
I’m often asked by mojo trainees: “Do I need to buy that FiLMiC app?” My simple answer is a question: “Do you need it?” Invariably they don’t know. So, I ask: “Did you know that your smartphone camera app can record video just by pressing down for a longer time on the photo button?”
My tip: Learn the features of your onboard camera app and only buy an advanced app when you need more features.
In a previous GIJN article I discussed how to tell whether you need a new phone. So, let’s assume you have a smartphone that you are reasonably happy with. I’ll use my phone — an iPhone 12 Pro Max — as my example. But almost all of the features I’m discussing are available on earlier models running iOS 14 — which is the iPhone operating system that was released last year — and on many other platforms, including Android.
Camera Controls in Settings
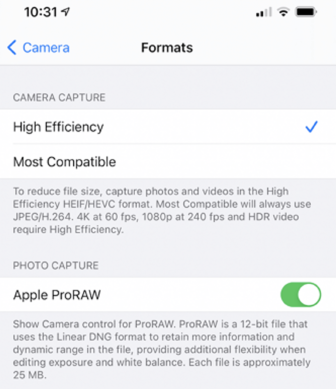
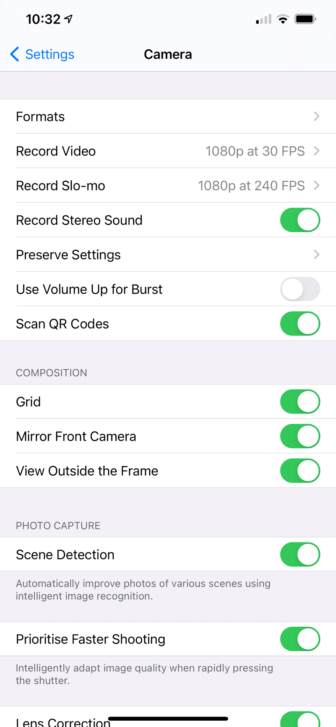
Before you shoot, take a look at the camera variables by going to “Settings” and then “Camera,” where you will find different options. I’ve listed just a few:
Format: You’ll see two or three settings, depending on your model: “High Efficiency” (HEIV/HVEC) will reduce file size; “Most Compatible” (JPEG/H264) creates larger files; “ProRAW” are 10-bit files that can be post-produced with dramatic effect (available on iPhone 12 Pro and Max). JPEG files use the phone’s computational power to create a more finished picture. ProRAW files won’t be as sharp, or as punchy, until you have treated them. They offer finer control over white balance and highlights, and provide more dynamic range in the shadows and skin tones. The question for investigative journalists is: Will you need, or have time, to fiddle with your pictures to this extent?
Record Video: Choose your recording frame rate and resolution; the higher the resolution, the better the overall quality, but the more storage you will need. Generally, it’s fine to shoot at 1080p “High Definition,” but options enable lower 720p and higher 4k resolutions. If storage on the phone is an issue use a smaller resolution; Apple’s “space saver” option of recording 1 minute of 720p video at 30 frames per second (fps) takes about 40mb of space on your phone, whereas at 4k it’s about 170mb. 30fps is a standard online (and the frame rate used by broadcasters in the United States); 24fps gives a more filmic look, and some apps enable 25fps, which is compatible with TV broadcast requirements in Europe and Australia. My tip is that unless you really need to, don’t shoot in 24 or 25fps if you can’t edit in those frame rates.
Record in Slo-Mo: Current iPhone models can record slow motion video in either 120 or 240 fps. (It might seem counter intuitive, but you need to shoot faster to play back slower.)
Record Stereo Sound: Do you need stereo on a device that doesn’t record a split or true multi track? You can always add a second mono track in the edit if you need to get “dual mono” like “stereo.”
My tip is: If you need split track audio recordings — for mixing or editing between two interview sources, or main and background audio, for example — you’ll need to use a separate recorder like a Zoom H1 to get two tracks.
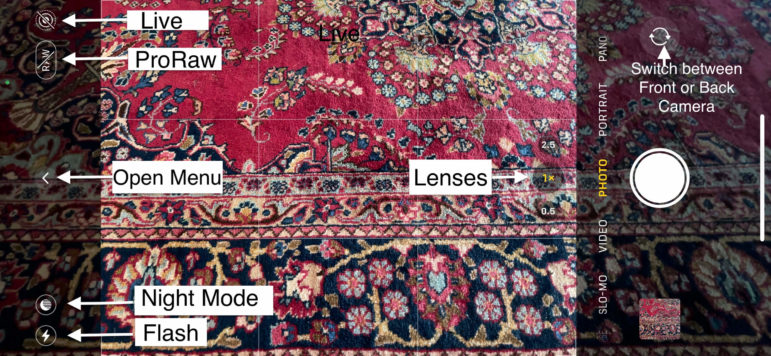
Screen Camera Control Icons
Flash: Switch the flash on with either the manual or auto sensing option.
HDR: This stands for “High Dynamic Range” which is used to take better pictures in situations with deep shadows and very bright highlights. In HDR mode, the camera takes three photos:
- An image at standard exposure.
- An overexposed image that allows good shadow detail.
- An underexposed image that pulls down brightness levels so white areas avoid blooming and show more detail.
The final image is a composite of the three. HDR can be switched on or off (in the same place as before: “Settings,” then “Camera”) or left in Auto mode, which triggers HDR when the app senses shadows or highlights. In Manual mode HDR shows on the top left of the screen.
Timer: This allows you to set up selfies with two timing options (of 3 or 10 seconds).
Frame Orientation Modes
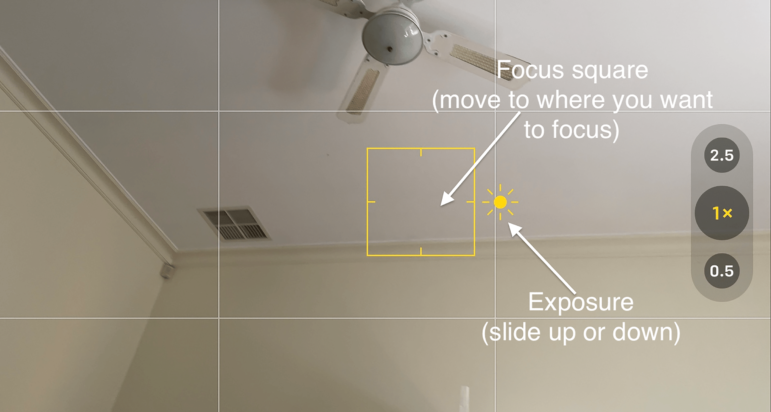
Photo: Shoot individual images, or a burst of stills, in either portrait or landscape orientation. These can either be stills or live photos that move when you touch them. In Photo mode the camera focuses automatically, or you can move and then press the yellow square to focus manually. Using the “Quick Take” option on later models, pressing and holding the white shutter activates video, while moving it to the right locks video on. The “Square” mode creates an optimal square frame for many social media apps, like Instagram. Click the arrowhead you can see on the left on later model phones, to reveal framing menu options.
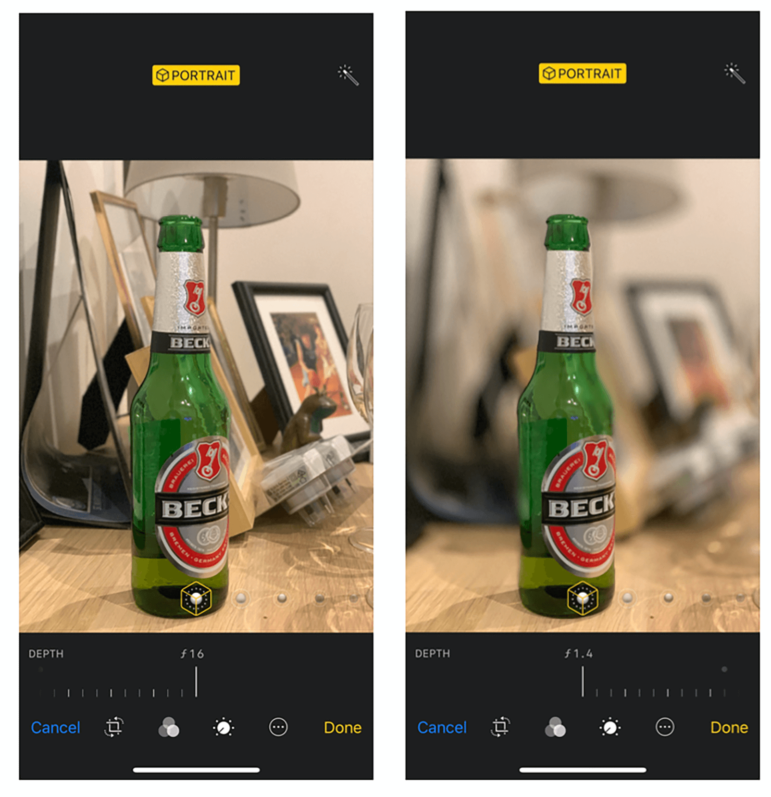
Portrait: This creates a depth-of-field effect, letting you compose a photo with a sharp subject and then alter the aperture — or f stop — to create either a blurred and out of focus, or more focused, background, even after the shot is taken. Take the shot in portrait, bring up the shot in your camera roll, tap “Edit,” and from there alter the f stop to a larger number for greater depth of field, which will show more of the background, or a smaller number for shallow depth of field to focus on the object at the front by blurring the other elements.
Panorama: To create a panorama image hold the phone in a vertical (portrait) orientation, press the shutter button, and pan as you shoot, following the arrow.
Video: Shoot either portrait (vertical) or landscape (horizontal). When choosing the orientation consider the platform.
Slo-Motion: (See above)
Time-Lapse: The camera captures footage at selected intervals to create a time-lapse (or fast moving) video. When you choose time-lapse mode and tap the shutter button, your camera periodically records footage (1 second every 6 seconds, so if you record for 60-seconds you’ll have 10 seconds of video) until you tap the shutter button again. Use the free Hyperlapse app to alter interval times. Here are some effective interval times: 1 second for moving traffic and fast-moving clouds; 1-3 second intervals for sunsets, sunrise, or slow moving clouds.
Night Mode: on the latest iPhones your camera will activate Night mode automatically to shoot in low light. You can adjust the length of shot by pressing the Night mode button and using the slider. Like any camera using a slow shutter speed, you’ll need to keep your camera steady.
Focus and Exposure
Tips for Improving Focus and Exposure in Pictures and Video:
- Focus on the subject you want to highlight.
- Maintain your distance from your subject during shooting to help the focus; avoid getting too close if you don’t want focal point blur.
- Use Auto focus, then fine tune the focus using the Manual setting.
- When taking portraits, expose for skin tone.
- Generally, expose for highlights to avoid a washed-out image, and shadow to avoid losing detail. You will need to decide what is most relevant.
- You should usually shoot with the light over your shoulder onto the subject, but don’t be afraid of silhouettes and shooting into the light for effect.
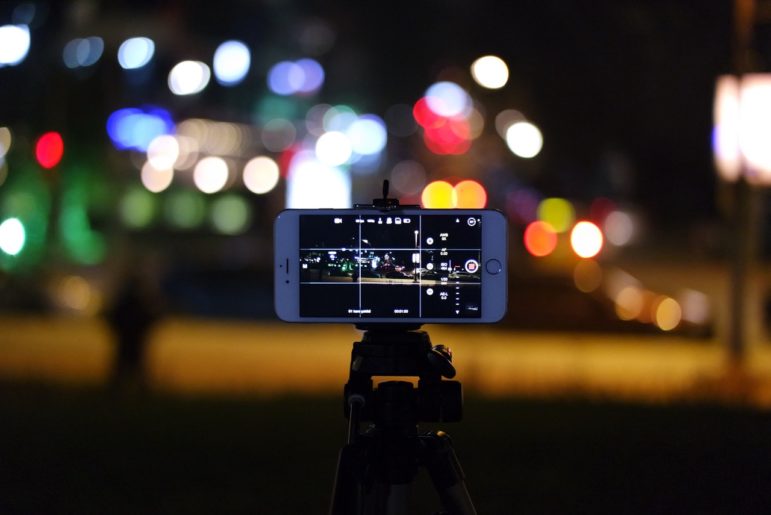
- In very low light eliminate camera movement as much as possible, by using a tripod.
- Avoid the zoom, because zooming smoothly is difficult, even though the iPhone 12 Pro has a 4 x optical zoom range and a 10 x digital zoom range. If you need to zoom try and use the optical zoom, because it doesn’t degrade the shot and focus as much.
Multi Lens Smartphones
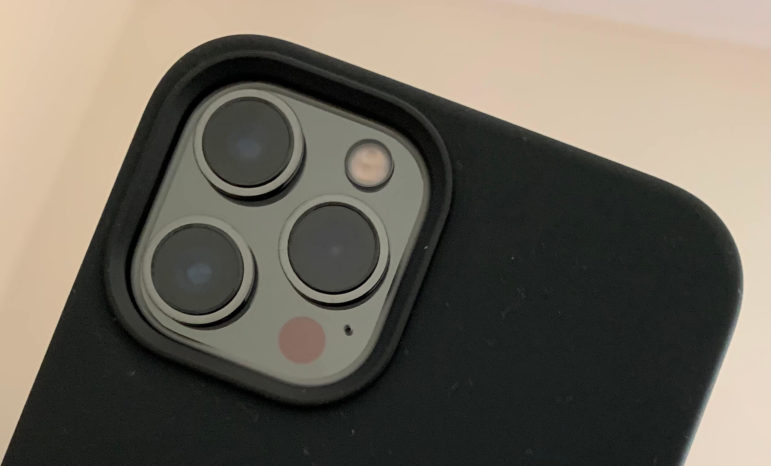
Most smartphones have at least two lenses. The new iPhones can have three: Ultrawide: 13-mm (120° file of view), f/2.4 aperture; Wide: 26-mm (1.7um pixels larger sensor), f/1.6 aperture; Telephoto 65-mm, f/2.2 aperture. The wide lens has a larger sensor, which means larger pixels that are more light sensitive (see this article in Mojo Workin explaining pixels).
Finally, don’t be afraid of your camera settings; play with them to better understand their function. Framing is critical to telling your story, so turn on the screen grid in the settings area to help you focus on your main subject. Play with the settings and when you need more control, such as over the shutter (the speed of the lens), or ISO (the electronic sensitivity of the camera’s sensor), or control over white balance, look for a paid-for advanced stills or video camera app.
For an advanced video app try FiLMiC Pro. For an advanced stills app try Camera+. Go Mojo.
Additional Reading
Mojo Workin’ — Essential Mobile Journalism Tools
Mobile Journalism Guide: How To Get Your Mojo Workin’
9 Types of Visual Storytelling on Mobile
 Ivo Burum is a journalist and award-winning television producer, based in Melbourne, Australia. He has over 30 years of experience producing prime time programming and lectures in media at La Trobe University. A pioneer in mobile journalism, Ivo runs Burum Media, a mojo and web TV consultancy. His latest book is “The Mojo Handbook: Theory to Praxis.”


