Mojo Workin’: Editing on a Smartphone
Read this article in


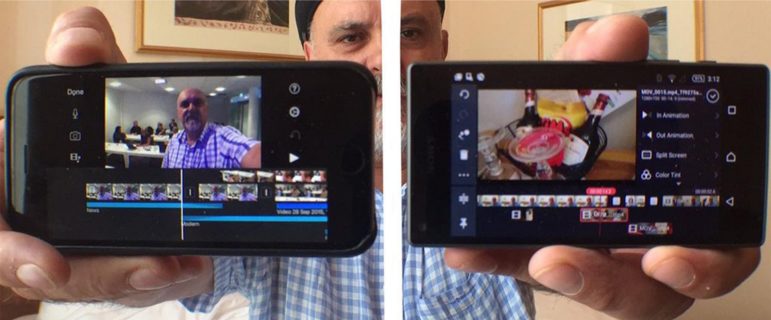
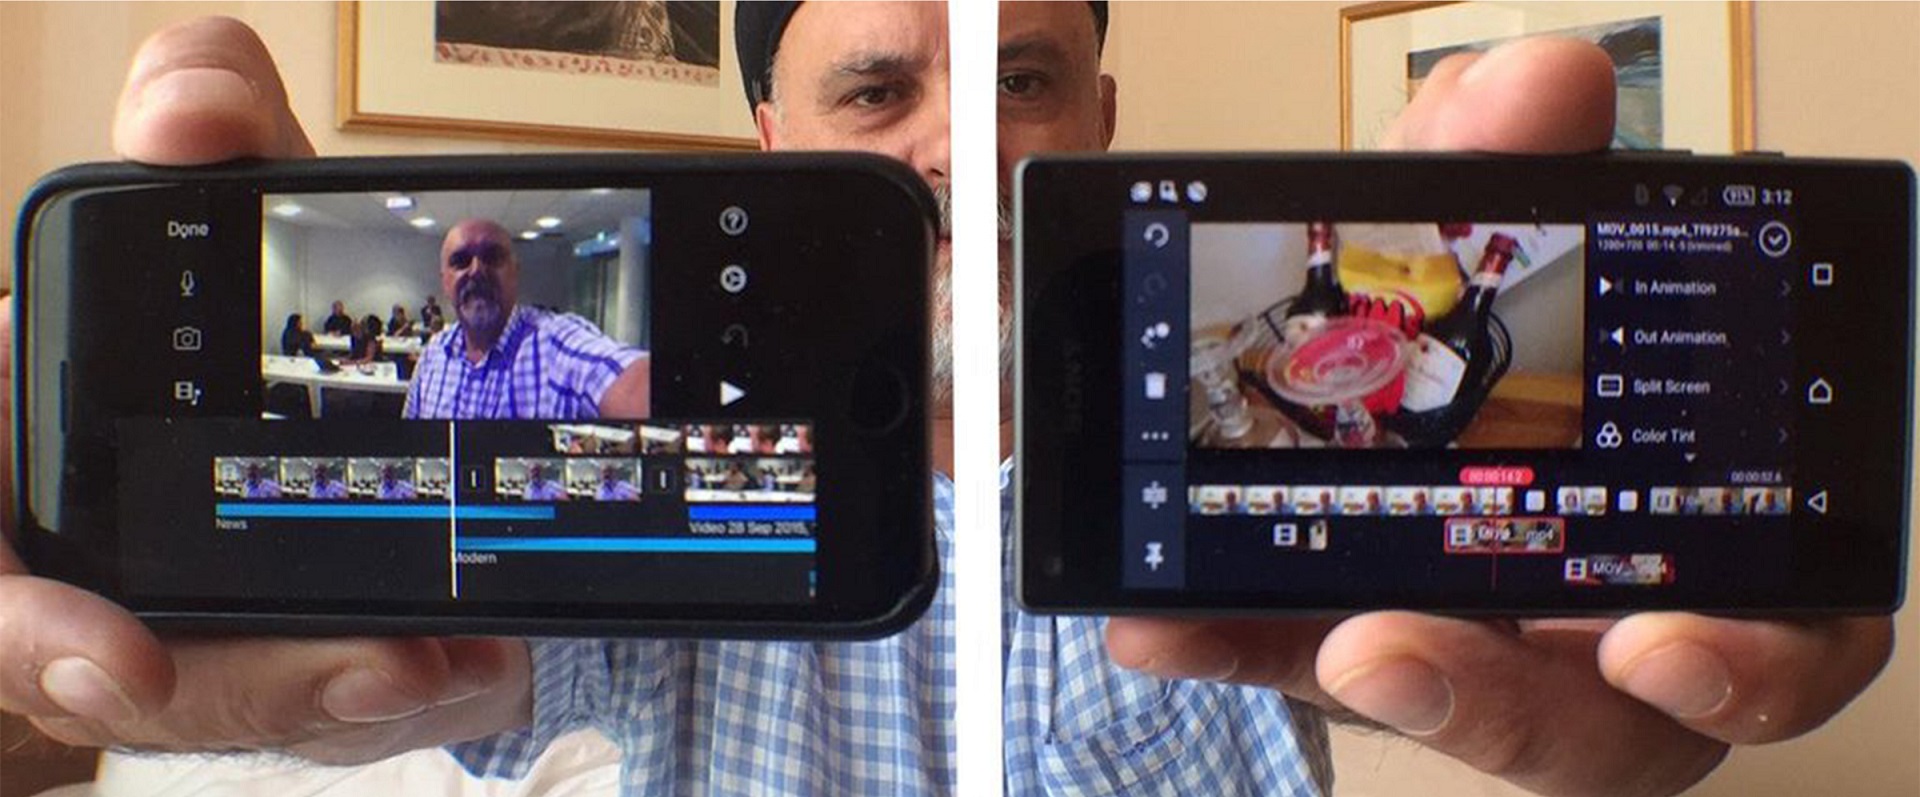
Synonymous with smartphone editing is a growing tendency to gadget worship. Every snappy new edit app sparks a flurry of texts and Facebook posts about its list of features. However, editing is more about storytelling — knowing why and when to make a cut — than it is about technology.
 Rana Sabbagh, executive director at Arab Reporters for Investigative Journalism, says all journalists should learn to edit stories on a mobile.
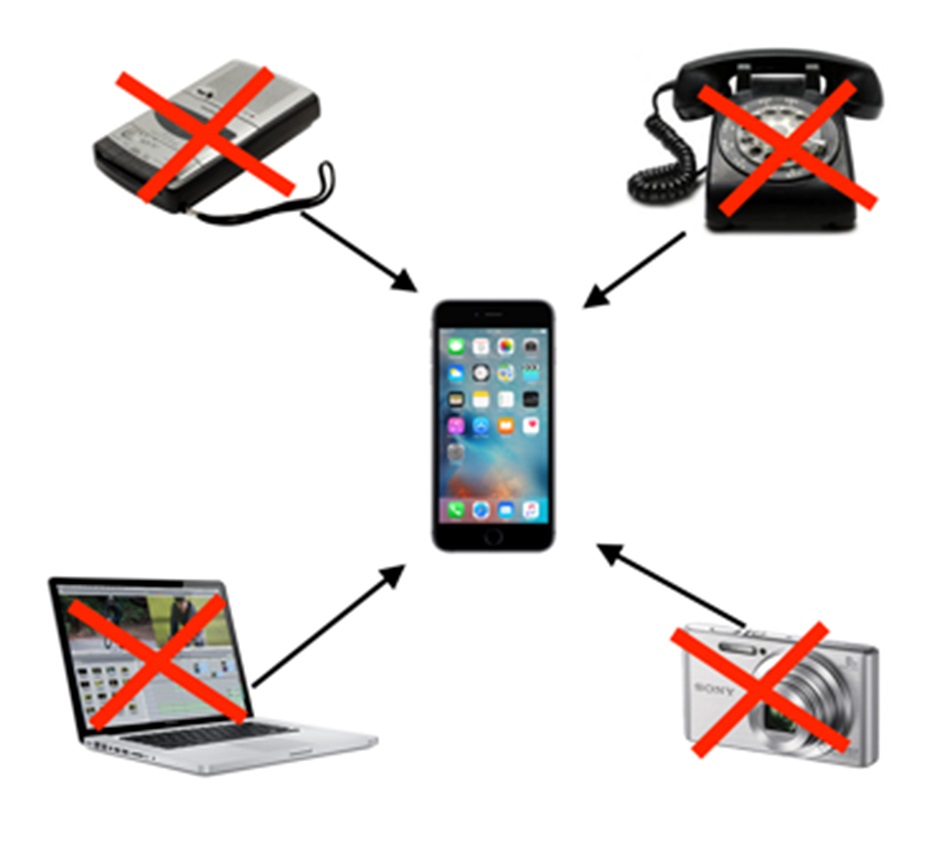
“Being able to shoot, edit and publish using a smartphone increases the potential of immersive cross border and cross media reporting from marginalized areas,” Sabbagh says. “Editing generates diversity in storytelling and a local point of view and in the Middle East working on a mobile is often safer than carrying a large camera and laptop edit suite.”
Today, technology and convergence makes it easier to edit sensitive content in the field and transmit investigative reports across borders.
Former Newsday reporter TC McCarthy said his approach to finding the right mobile tool was “trial and error.” With smartphone editing that’s no longer the case. The ability to create and slide B roll, alter transitions, duck audio, mix music, create versatile titles, and render and send projects to various target sites enables journalists to produce professional stories on their smartphones, published from almost anywhere. It can all be done on Android or iOS devices, but to make smartphones real tools, we need to wrap the technology in a literacy, which I call a common digital language.
 Editing is a way of thinking about converging states of immediate possibility. More specifically, it is a visual language that contrasts shots and audio by juxtaposing symbolic moments, parallel action or a lingering shot. Editing is a form of digital writing that teaches journalists how to be better visual storytellers.
Whether editing on an old Steenbeck or on a smartphone, the focus is still story. The difference is that if you’re editing on a smartphone you most likely shot the story yourself. It may be breaking news, and if so, after editing you’ll need to publish it from location. Here are some basic tips on how to go about doing your smartphone edit.
In the Field
Make a story plan early in the production cycle and well before you begin editing. I concentrate on the SCRAP story development tool I used at the research stage:
- Story — what is it, why am I telling it and who is the audience.
- Character — who are the interviewees and how will I use them in the edit.
- Resolution — what is the structure and where will it take the story.
- Actuality — what actuality will I record and what other elements will I need in the edit.
- Production — what are the logistics for filming and the edit.
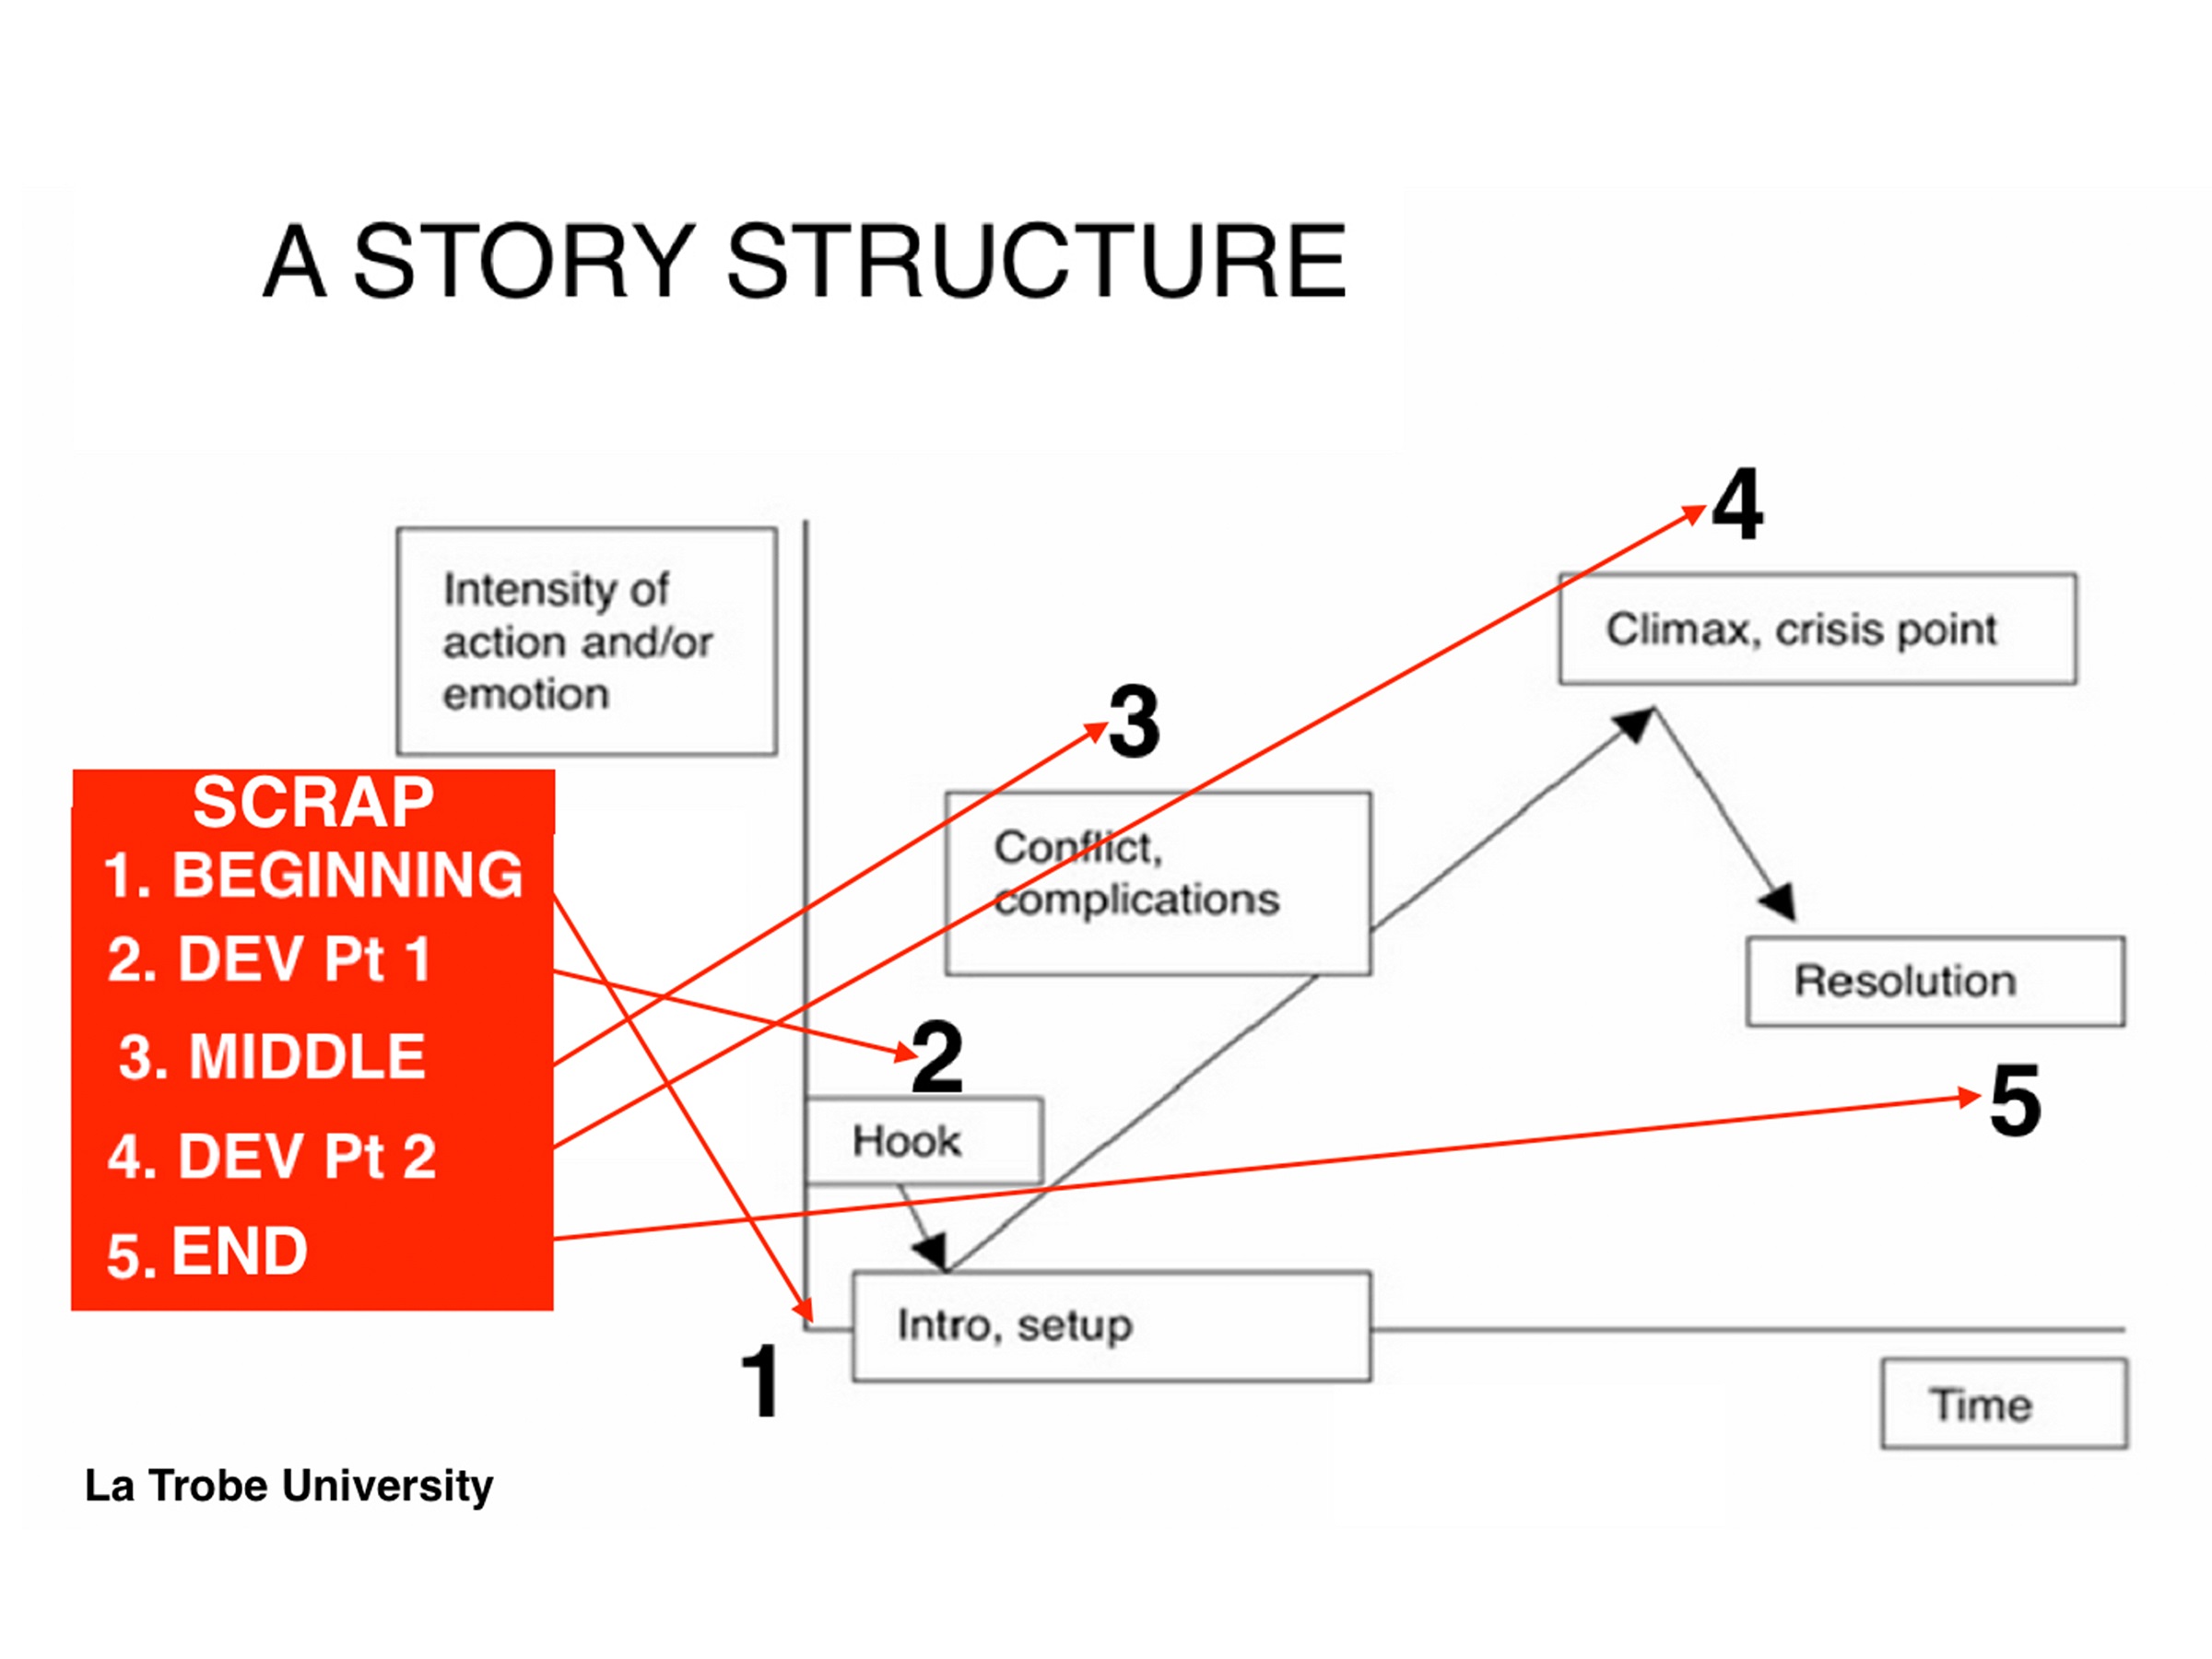 SCRAP answers journalism’s five ‘Ws’ and, with the five-point story plan, it forms my first edit map. I number the arc steps on my plan and note the elements I record — my interview questions, actuality and B roll — against certain story points. This indicates what media I have shot, what’s missing and how it might best be used in the edit.
Beginning the Edit
Starting is important, especially when you can’t make up your mind about how to start. When I first edited pictures more than 30 years ago, I was lucky enough to learn about editing from Ulla Ryghe, Ingmar Bergman’s editor. Ryghe taught me the hardest lesson in editing when she said, “Ivo, you need to learn to kill your babies.” Beginning the edit narrows your choice parameters. As your story unfolds on the timeline, many shots and sequences you once loved become redundant.
Begin with the strongest elements — actuality, interview grabs, overlay, music and/or narration. Something “real” from the story that captures emotion is better than a Piece To Camera (when someone speaks directly to the audience through the camera). But a standup can be very effective if the journalist is in the middle of a riot. Don’t get bogged down finessing the edit before you find the structure and the emerging story.
Ivo’s Tip: Structuring a story in a way which answers what you expect will be listeners’ questions, in the order they might arise, creates an engaging story.
The Story Cut
Using two video tracks (V1 and V2) enables the story cut to be edited on V1, leaving V2 to add B roll. This places the focus on story — writing in and out of the interview bites and actuality — rather than on B roll. However, two video tracks also enable B roll to be edited early, enabling a fine cut to be done as you edit.
Figure 1, below, is known as checkerboard editing — video checker boards with narration. This is done so that you can easily replace, shorten or extend these B roll shots when they are eventually inserted, something that is difficult if all shots are slotted into gaps on one track (V1).
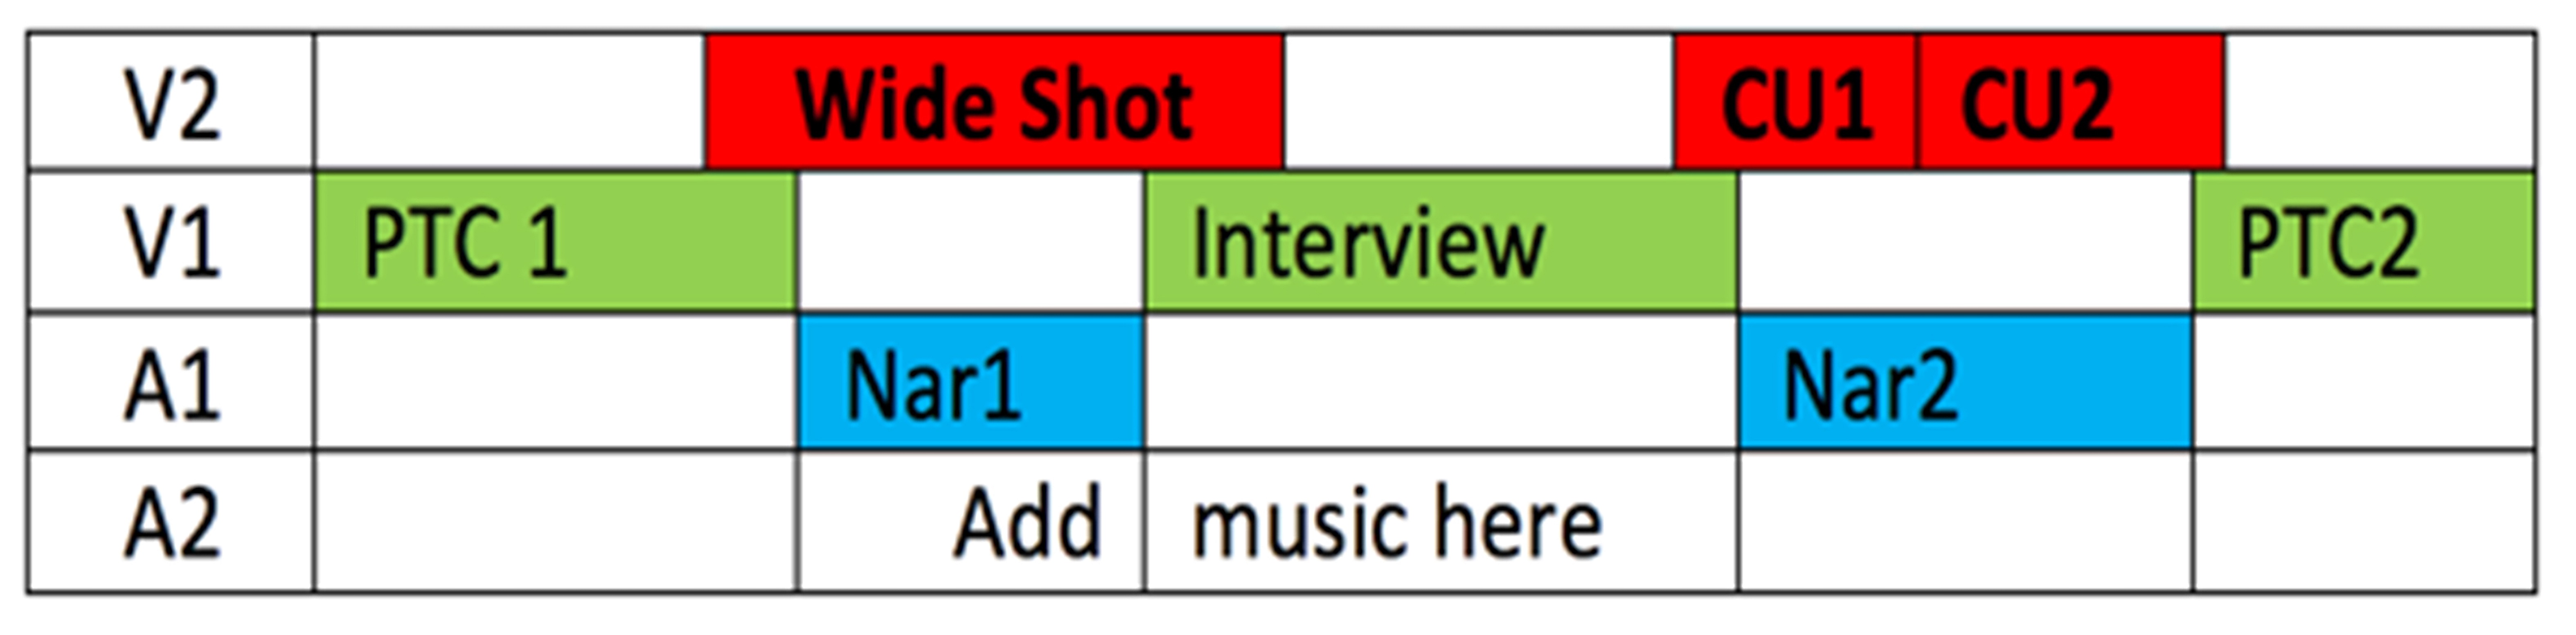
Figure 1: Checkerboard editing.
The example shows how you might extend the wide shot to overlap some of the interview and do the same with CU 1 (close-up) or CU 2. This provides a more dynamic feel to the edit. But if the wide shot was on V1, squished between the PTC and the interview, it would be difficult to extend without first detaching the PTC and interview audio. A2 is left blank, but you could add some music here.
Ivo’s Tip: Changing butt edits (where edits butt up to each other) to split edits, or “J” and “L” cuts (where edits overlap at the beginning, or end of a clip) creates a more dynamic and urgent edit pace.
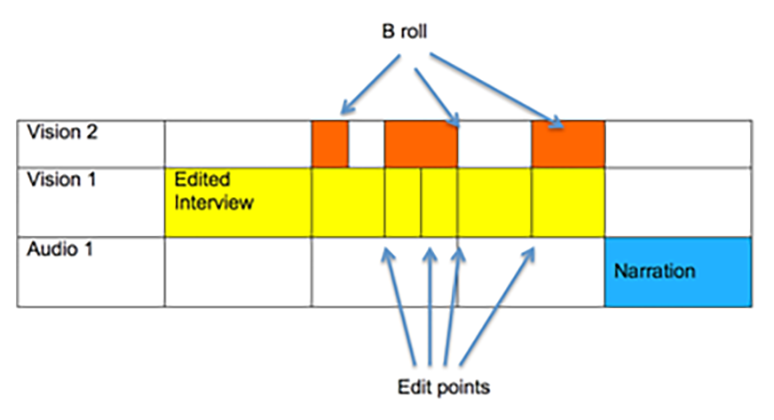
Editing B Roll
Supplemental footage intercut with an interview grab, is called B roll, overlay or cutaways. It covers an unwanted zoom, a jump cut in a shortened interview, a fast whipping pan and mistakes in shooting. Hence B roll is used to compress and expand sequences.
When recording an interview, make notes of what’s said. The interviewee might mention an important stamp which they own. In this case, to assist editing that scene, B roll might include the stamp and even a sequence with the person looking for the stamp in their album. When placing B roll on the timeline, insert it a couple of frames before what is being described is mentioned.
 Writing and Editing Narration
Narration is usually written and recorded during the edit. Before pocket edit suites we would write narration in the car or train on the way to the edit. In the mobile eco-sphere, it can happen at the scene. So you need to be prepared with that five-point plan that contains your location scribbles and narration notes.
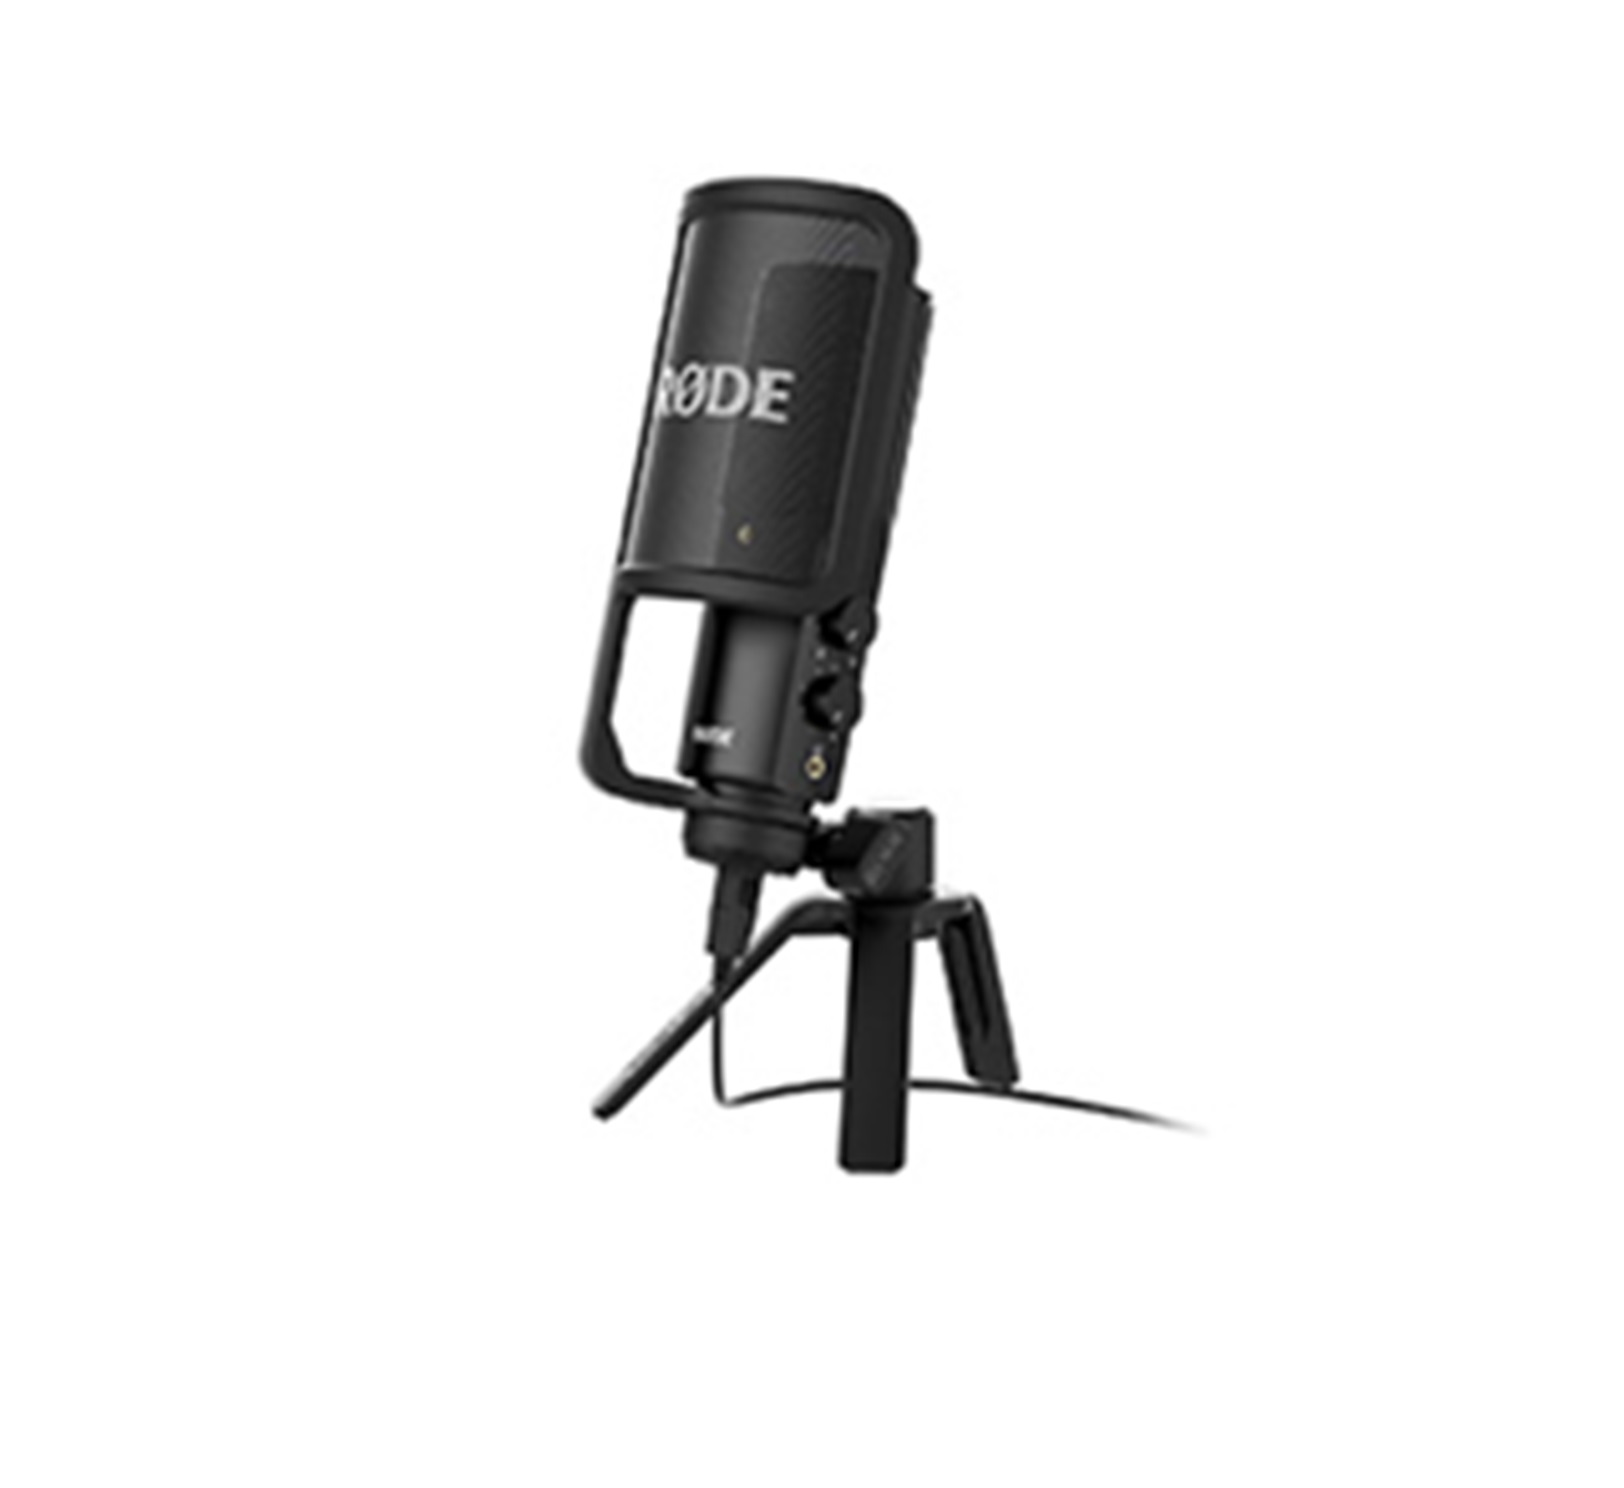 Read the Narration Script into an external microphone plugged into the smartphone and about 6 inches from your mouth. Recording the audio (as vision and audio) directly into a camera app enables you to find it fast during the edit. (You can read more about these points on “Recording Audio on A Smartphone.”) Detach the audio from the video when adding it to the timeline. Except in very special circumstances, where you need audio at super high bitrates or specific forms, you won’t need to use a separate audio app to record video narration.
Narration is used to compress rambling interview dialogue, expand sequences and to segue between story elements and structure. Narration bounces the story forward by relating to the outgoing pictures and introducing the incoming video. This is called “writing in and out of pictures,” and is one of the most important edit skills.
When writing and timing narration, you can work on three words a second, the speed at which we generally read for television. If your video is seven seconds long, you’ll need between 19 to 21 words of narration.
Ivo’s Tip: Narration shouldn’t repeat what is said in the first words of the incoming audio. It should lead into the video and form one cohesive thought, which drives story from one structural, editorial or emotional point to the next.
Here are some basic tips for writing and recording narration during the edit:
- Speech is more informal, so write spoken English.
- Write in the present tense and active voice so the audience feels the currency.
- Use mostly simple phrases and sentences — one idea per phrase or sentence. Sentences should be about 5–25 words.
- Write simply and clearly so that your mum and dad will understand.
- If possible use your hands to help inflect and punctuate the rhythm.
- Don’t inflect every second or third word like a newsreader.
- Don’t read and report — tell us a story.
- Remember that the first few words are often not heard, as the audience tunes off and tunes into the story.
Ivo’s Tip: Get a rough narration down quickly to establish timing and structure.
The Fine Cut
Once the edit is in a rough form (with B roll in place) you’re ready for the fine-cut. The steps I might use at this stage are:
- Go back and watch the edit but don’t change anything at this stage.
- Make notes about what you feel at each section, especially the story bounce.
- Go back to the beginning and start fine cutting. This may require:
- Shortening shots to lose any dead air after someone finishes talking.
- Ensuring that words aren’t clipped.
- Sliding B roll shots left or right in the timeline for correct placing and impact.
- Adding or replacing interviews and or B roll.
- In some cases, you might need to record the narration again.
This is different for everyone, but the following is what some editors look for in a cut:
- Emotion — the cut has moments of emotion.
- Story — the cut focuses and moves the story forward.
- Rhythm — cuts occur at the right time to assist story bounce.
- Screen and story relativity — that we understand the story continuity.
Because “information flow” is a big consideration, I always ask:
- Why am I cutting to new information?
- Is that new information right?
- Where does it take me?
When the story is not working on the timeline it is generally because the sequence includes redundant shots and information. Go back to the beginning and watch the edit again. The point where the story fails to move forward is generally where you need to edit. More often than not, the fix is to remove footage, close the edit and check.
Here are some basic edit rules:
- Never make a cut without a positive reason.
- When undecided about the exact frame to cut on, cut long rather than short.
- Whenever possible cut “in movement.”
- Current is preferable to the “stale.”
- Substance first, then form. Don’t use a shot unless it moves the story forward editorially, with new information or heightened emotion. Cut for story rather than shots, even in fast montage sequences.
Edit Apps
I introduced edit apps in “Essential Mobile Journalism Tools.” Use an edit app with two video tracks or more:

- iMovie is quite old but quietly powerful. It’s real failing is its titles package and its lack of a dedicated audio ducking (raising and lowering audio) facility.
- Luma Fusion is an iOS app that’s loaded with features, but it has a very difficult interface which they say they are upgrading.
- Kinemaster is a fully featured iOS and Android app that has an excellent UX, powerful onboard graphics, audio ducking and even does green screen. The next version will enable export to Premier Pro.
You can check out this link to a primer that outlines some features of these apps.
Even after decades of video production, editing still feels like magic. Only 20 years ago this magical experience was costly — now we carry our very own creative suite in our pockets. We only need to learn how to use our smartphones to write digitally and that’s editing.
Go mojo…
 Ivo Burum is an Australia-based journalist and award-winning television producer. He has over 30 years of experience producing 2500 hours of prime time programming. A mobile journalism pioneer, Ivo runs Burum Media, a consultancy that provides training, and is a coordinator and lecturer of Media Industries at La Trobe University.

This work is licensed under a Creative Commons Attribution-NoDerivatives 4.0 International License
Republish our articles for free, online or in print, under a Creative Commons license.
Republish this article
This work is licensed under a Creative Commons Attribution-NoDerivatives 4.0 International License
Read Next

Reporting Tools & Tips
How to Take Better Images on Your Smartphone
Smartphones have bigger hard drives and more power than some laptops. And while there are millions of apps, many of them used for filming and photography by mobile journalists, Ivo Burum says that the standard features of ordinary smartphones should be mastered first.
Reporting Tools & Tips
Mojo Workin’: Choosing Your New Mojo Smartphone
When it comes to doing mobile journalism, is there a big difference between expensive Androids and iOS phones? Is using an old phone fine and, if not, which phone should one upgrade to? Mobile journalism trainer Ivo Burum offers up the skinny on phone basics, the truth about pixels, lenses and more to help journalists decide the best phone to get the story done well.
Reporting Tools & Tips
9 Types of Visual Storytelling on Mobile
In September 2017, the lead producer for the BBC Internet Research & Future Services, Tristan Ferne, identified 12 different story formats used in digital news. With new formats constantly emerging, Emma-Leena Ovaskainen, a visual journalist for Finland’s biggest daily newspaper Helsingin Sanomat, has modified the list and made her own additions.

Reporting Tools & Tips
MoJo Workin’: Developing and Producing on a Smart Phone (Part 2)
In part two of this Mojo Workin’ column on developing and producing the story, Ivo Burum focuses on equipment, coverage and audio perspective.